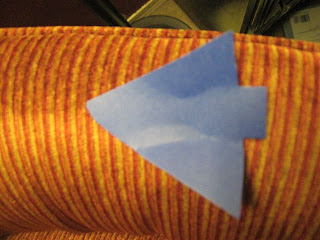


Okay so I posted a pic of this to my FB account and had 2 requests to give the details on how to make it. I will preface this by saying I haven't really figured out how to make it into a working pinata. I figure I have a few weeks to get that part taken care of. :o)
That being said I made the pinata in a couple of days and the bigger little guy helped me.
Supplies:
Newspaper ripped up into strips
School Glue
Water
A balloon
2 containers-one for the glue water mixture needs to be on the shallow side
one to set the balloon in to dry
Colored tissue paper (we used blue and purple but traditionally bats are black :o])
Colored card stock to match the body
String
a stick
a knife
How I did it:
1. Blow up the balloon to the size you want. Make sure to use a round balloon instead of one of those long ones. Set it in your container with the knot on the bottom
2. In the shallow container add some water...start with about a cup...then squeeze the school glue in until it makes the water milky. If you are a purist you could use papier mache paste but I am lazy so I didn't use it this time. Here's a good recipe if you want to go that route http://familyfun.go.com/arts-and-crafts/cutpaste/feature/famf0702_feat_pinata/famf0702_feat_pinata2.html
3. Begin dipping the newspaper strips in the mixture. This part is pretty messy so you want to make sure you are doing it outside or on a floor that is easy to clean up. Add strips in a criss cross fashion until you've covered all but the very bottom of the balloon. Then add another layer. Keep adding strips until you've covered the balloon 3-4 times.
4. Let this dry for a few hours or overnight.
5. Rip up strips of the colored tissue. It is much messier when you dip it in the glue solution. It gets pretty tacky and will probably stick to your hands but do your best to cover the balloon. Do as many layers as it takes to hide the newspaper. Lighter colors will take more layers.
6. Let this dry for a few hours or overnight.
7. Pop the balloon and pull the remains out.
8. Take your cardstock and cut out ears and wings. I wish I could give you a template but I can't. I just sort of figure out how big to make things. The main thing is you need to cut them with a tab. Because you are going to put the tab into a whole in the bat body. So for the ears cut out a triangle with a small rectangle attached to the bottom. Does that make sense? And for the wings...well it's kind of like a big triangle with three sweepy cut ins at the bottom and a tab on the side that isn't pointy. Oh why don't I have my tablet set up with this computer so I could just draw you a picture. Anyhow I hope you get it.
9. Take your knife and cut two small slits the size of your tabs on the top of body. Stick the tabs into the slot and bend the ears slightly. You may want to tape or glue them into the slit.
10. Now take the knife and cut two slits the size of the tabs of your wings on the side of the body. Stick the tabs in and once again you may want to glue or tape them in.
11. Next take the knife and cut a small hole on top of the body between the ears. Push the string down through the hole and all the way to the hole at the bottom of body where the balloon was. Tie the string around a small stick and then pull the string back out the top hole. Hopefully this will help keep the pinata up even when the kids are whacking it.
12. Last but not least give your pinata eyes and a mouth.
When I figure out how to turn it into a pinata that kids can actually get the good stuff out of I'll let you know. For now it's a pretty cool decoration although at 2 am when I walk into the living room to get a drink of water it is probably going to FREAK ME OUT!
If you have questions let me know. And if you end up making one post it so I can see how yours turned out.
No comments:
Post a Comment